Tuesday, January 31, 2012

Afternoon Tea Tuesdays: Teacup Necklace

Years ago I purchased a small pink teacup necklace with a bronze spoon and
chain. I've worn it so much its begun to fade in colour and the bronze chain has
gone black. So its time to search for a new beloved teacup necklace. I've hunted 
around for months and have come up with four possible choices so far.
I don't know which one to choose as they are all so gorgeous.

1. AgHalo
4. La Rie

Monday, January 30, 2012

Classic Bakes: Scones


Scones are one of my favourite comfort bakes. With so many variations
of the humble scone, I don't think I have ever baked the same recipe twice. 
I have yet to stumble across one recipe that shines above the rest. This
batch of scones I lathered with blackberry jam, fresh blackberries and thick
dollop cream. I prefer to not have sweetened cream on scones as it makes 
them to sweet and sickly when paired with the jam. 


Vanilla Bean Scones 
(Recipe: Aus Women's Weekly; Afternoon Tea) 
Makes about 16 normal sized scones. 
I like to make a mixture of normal and mini. 


2 1/2 cups self-raising flour
1 tablespoon caster sugar
30g butter chopped
3/4 cup milk
1/2 cup water 
1 vanilla bean / 1 teaspoon of vanilla bean extract


To serve 
Jam of choice
Fresh berries 
Thick cream 


Preheat oven to 220 degrees Celsius. Place baking paper onto a baking tray. 
Sift flour and caster sugar into a bowl and rub in butter to make fine 
breadcrumb texture. Rub between thumb and fore finger. In a jug mix 
water, milk and vanilla stirring to combine. Add mixture to flour using a 
knife to cut and combine to a sticky dough. Turn onto floured surface and 
gently knead till smooth. Carefully pat out dough to desired thickness 
and cut out circles using a floured biscuit cutter. Place onto baking tray allowing
each scone to just touch each other on the edges. Brush scones with a little milk. Once baked serve with jam and cream. Best served warm and on the day of baking. Can be frozen up to 3 months - Thaw in low oven wrapped in alfoil. 


Tuesday, January 24, 2012

Afternoon Tea Tuesdays: Tea Towels


When I was younger we had an odd vintage tea towel with a recipe print 
(Aussie Pavlova / Scones) or an Australian sightseeing souvenir design. Currently the drawer is full of green checkered tea towels to match the green kitchen table. I think this collection of afternoon tea themed designed tea towels need to be sneaked into my kitchen to make washing up more visually appealing. Or maybe even just put in a frame for my room.

1: Hard to Find Noice - By Materialistic 
2: Hard to Find:  French Fancy - By Materialistic 
4: Hard to Find:  Tea For Two - By Me and Amber

Friday, January 20, 2012

18th Birthday Cupcakes


My brother just had his 18th birthday. When I asked
if he would like me to make a cake for him he happily
accepted but proposed a list of requirements.

The List: cookies and cream cupcakes with the cupcakes
being white cake with cookies mixed in (with a cake to
cookie ratio of 1:1), flattened plain white frosting and a
piped 1 with two mini oreo's for the 8.

I thought the ratio was hilarious. I was quite glad of
the requirements / specifications as it made recipe hunting
easy and allowed me to not be picky and indecisive.  
So I settled on; white chocolate cupcakes with 1/2
biscuit in the bottom, 1/2 on top with white chocolate
fudge frosting. After I made the frosting, he decided that
he did want cookies mixed into the frosting. So I processed
some oreos and added them into the frosting but when
combined it hardened the frosting and made its taste texture
quite fatty and sweet. I think it was a reaction between the
cream in the frosting and the cream icing in the biscuit.
I don't recommend adding crushed oreos to this frosting
recipe. Nevertheless, to my brother and his friends they loved
it. I guess thats the difference between 18 and 23 yr olds
tastebuds. This cupcake recipe has a lovely light and fluffy
texture. Also note that the uncooked batter is pretty tasty too.


Cookies and Cream Cupcakes

(Recipes adapted from: Donna Hay - Simple Essentials; Chocolate)

Makes 12 1/2 cup cupcakes.

White Chocolate Cupcakes with Oreos
100g butter, softened
3/4 cup caster sugar
2 eggs
1 1/3 cup plain flour, sifted
1 teaspoon baking powder
1/2 cup milk
100g white chocolate, melted
12 oreo biscuits, quatered

White Chocolate Fudge Frosting
250g white chocolate
1/2 cup pouring cream
70g butter

Preheat oven to 160 degrees celcius.

For the cupcakes; line a 12 cupcake pan with patty pans.
Beat butter and sugar in electric mixer till light and creamy.
Add in the eggs, followed by flour and baking powder until
combined. Gently fold through milk and white chocolate
alternatively. Place 2 quaters of one biscuit into the bottom of
the patty pan. Spoon mixture into patty pans followed by
gently pushing in the other 2 quaters of biscuit on to the top. 
Bake for 20 - 25 mins, or until cooked when tested with skewer.
**My cupcakes took about 35mins. 

For the frosting; place all ingredients over a bain marie
until melted and smooth consistency. Allow to completely
cool down then just before using, beat with electric mixer till
thick and fluffy being careful to not over beat and churn into
butter. Pipe  / spread onto cupcakes.
**I piped a dark compound chocolate number one.

Apple, Lime & Mint Mixer


In the summer time I tend to find a refreshing drink
I like and stick with it for the entire season.
2010 was ruby red grapefruit and a splash of cranberry.
2011 was homemade french earl grey iced tea.
This year its cloudy apple juice, fresh lime and minted
ice cubes. I've become addicted to it. I drank a whole
2 L apple juice with this combination in a day. I've also
turned it into a mixer by adding a splash of vodka or
rum in it depending on the mood.

Tuesday, January 17, 2012

Chocolate Truffle Cake -
Death by chocolate blog hop


After seeing all the entries from the Australian
Pavlova blog hop I was eagerly awaiting for the
next one so I could enter. I think the blog hop is a
great idea and it is amazing to see the different recipes
that come out of one single theme.

When Hungry Australian announced the recent blog
hop of Death by Chocolate, I instantly knew the recipe
I would bake. Chocolate Truffle Cake. This recipe from
Donna Hay (i love her fool proof methods) looks rich
and indulgent but its surprisingly not so rich that it leaves
you searching for milk / water to wash it down with.
Don't get me wrong, I'm a big fan of chocolate but if its
too rich it spoils the taste.

I've made this cake many times, as its easy after your
first attempt, makes you look like a cake whiz and
also a crowd pleaser. I love making this cake as
when I'm smoothing out the truffle icing it reminds me
of the cake from the children's movie Matilda where
Bruce Bogtrotters punishment is to eat a huge
piece of chocolate cake. That cake looked so good,
and I like to imagine it tasting a little like this.

I normally make this cake in a 20cm pan but this
time I made a mini double layer version using
2 x 10cm pans.


Chocolate Truffle Cake

(Recipe from: Donna Hay - Classics)

Makes one 20cm sized cake.

Cake
1/2 cup plain flour
2 tablespoons cocoa powder
1/3 cup caster sugar
4 eggs
80g butter, melted
*100g dark chocolate, melted* optional

Truffle filling
450g dark chocolate (good quality, I prefer organic)
2cups pouring cream
6 eggs yolks
1/3 cup caster sugar

Preheat oven to 180 degrees Celsius and line
a 20cm spring form tin with baking paper.

Sift together flour and cocoa powder, set aside.
Beat eggs and sugar with an electric mixer until
pale, thick and tripled in size, approx 8 - 10mins.
Then fold in flour and cocoa, followed by the butter
and the optional dark chocolate. *I add a little
amount of chocolate to the cake mix as it makes
the cake denser and more flavoursome*.

Pour the mix into the tin and bake for 25mins or
until the cake shrinks away from the side of the tin.
Its important that the cake does this to make
icing step easy. Cool cake in tin. I like to cool it upside
down so to make sure I have a flat top.

For the filling, melt cream and chocolate in a saucepan
over low heat. I prefer to finely chop the chocolate, heat the
cream to nearly boiling then stir in the chocolate which
quickly melts. It prevents me from burning the chocolate.
Once combined, set aside. Place the egg yolks and
sugar over a bain marie (heat proof bowl on top of
saucepan of simmering water) and whisk for 6mins
until thickened and creamy. Fold the chocolate mix
into the egg mix and beat until the filling is cool.
Place in fridge for 30mins.

Remove cakes and baking paper from tins and slice
the cake in two even portions. Place the bottom
layer back into the tin and pour over 1/2 the truffle
mix onto the layer. Give the tin a gentle tap on the
bench to release any air bubbles trapped in the
sides. The filling should run down the side of the
tin where the cake shrank from the sides.
Place second cake layer gently on top and then
pour over the rest of the filling, gently tapping tin again.
Refrigerate for 5 hrs or until set like mousse / ganache.

To remove cake from tin, place a warm / heated towel
around the tin to melt the sides. Cake should easily slide
out once spring form is released. Smooth any rough
edges with the back of a warm palette that has been
heated in warm water then dried quickly with a towel.

While this cake may seem daunting on the first attempt,
trust me with the fact that when you get a rewarding end
result you'll say...that actually wasn't that hard. Also always
remember the cliche, practice makes perfect and if you
live in a household like mine, a chocolate cake will
never go astray.

This is a blog hop


Sunday, January 15, 2012

Classic Bakes: Mix ' n ' Match Cookies


This cookie recipe is so easy and extremely versitile.
Whip it up in no time, chuck in a few mix ' n ' match
ingredients from the pantry and bake....or freeze in logs
for a unplanned tea party. These cookies are slightly
shortbread in texture, have a crumbly crunch and any
additional flavour can be added to your liking.
Love chocolate.....add a handful of chocolate chips,
prefer a healthy alternative.......fruit and nuts.


This recent batch I baked, I turned into three different flavours;
Chocolate chip, Lavender and Chai spiced. I love lavender in
foods. Lavender and white chocolate is also another great
combination.


Mix ' n ' Match, Slice ' n ' Bake Cookies

(Makes about 30 cookies with a 6cm diameter)

(Recipe adapted: Australian Women's Weekly - Cookies)

250g butter, softened
1 1/4 cups (200g) icing sugar
1 teaspoon vanilla extract
2 cups (300g) plain flour
1/2 cup (75g) rice flour
1/3 cup (50g) cornflour
2 tablespoons milk

Beat together butter, sifted icing sugar and vanilla in
a bowl with an electric mixer until light in colour and
fluffy. Stir in sifted flours; once at a time then add
the milk and the cookie dough is made. Too easy!!


Divide mixture evenly into the amount of different
flavours you would like; I divided into 3.
Place each dough portion into a different bowl.
Add the desired flavour ingredients. For a
rough measurement, if adding a bulk ingredient
such as; chocolate chips, nuts, dried fruit stick
to approximately 100g. Although if you like more
chunky bits add some more.

For the lavender cookies, I added 2 teaspoons of
lavender seed be careful not to add to much as too
much becomes over powering and bitter. Also make
sure the lavender you purchase is the edible type.

For the Chai spiced cookies, I added a 2 teaspoons
of this wonderful chai spiced creamed honey from
The Honey Lady, along with some extra cinnamon
and then sprinkled with demura sugar on top before
baking. You can always add chai coffee syrup,
mixed spice or cloves as an alternative.


Knead each dough until smooth and either;
roll out on baking paper to the desired thickness or
roll into logs wrapped in baking paper.
Place in fridge to chill and harden so its easier to cut.

Preheat oven to 160 degrees celcius / 140
degrees fan forced.For the flat rolled way just cut
out desired shapes and for the log unroll and cut slices
1cm thick. The log method is great for freezing.
Just make sure to wrap the baking paper log in
plastic wrap to prevent frost bite.

Place cookies onto a lined baking tray leaving room
to spread and bake for 20mins or until slightly golden.
Cool on wire racks and store in airtight containers.


The flavour possibilites are endless; Orange and
poppy seed, Orange chocolate, Cranberry, pistachio
and white chocolate, M & M's, Cardamom and rose
extract.......Happy baking.


Thursday, January 12, 2012

Project: Classic Bakes


408

I've decided to set myself a project, as I feel less productive
and slightly bored since completing full time study.
The project being named; Classic bakes will consist of me
hopefully having time to once a week bake / cook a classic
recipe suitable for afternoon tea.

When I think of 'classics', I picture goodies and treats that
were childhood favourites, made the rounds at parties or
school fairs and simple 'go to' recipes needed to be whipped
up in a moments notice. If any one has any suggestions
on recipes to bake, please feel free to leave a comment.
The first project post will be up soon.

(Image via: Blondie 'n' SC)

Sunday, January 8, 2012

Peanut butter cups


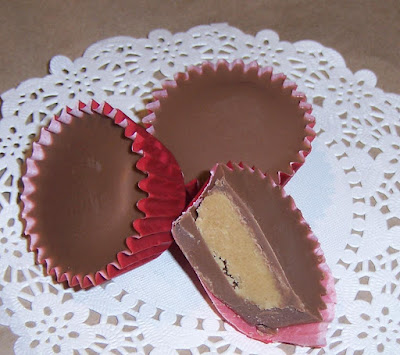
I've only recently stumbled upon the delicious American
sweet, Peanut butter cups. They seem to be popping up
in stores everywhere of late. I've become hooked on them
for a small treat and sometimes add a sprinkle of salt flakes
for an additional indulgence.

Luckily I saw Cupcakes and Cashmere ovely post on making
your own, as I had thought of making them but would have only
made it with the basic ingredients; chocolate and peanut butter.
It didn't even come across my mind of adding brown sugar /
butter that makes it sweet and smooth. So I'm glad I found this
recipe before I attempted them. 

The original recipe from Brown Eyed Baker
was easy to follow and my batch ended up looking just like
their pictures and tasted so good. My younger brother can't
get enough of them. They keep very well stored in air tight
containers in the fridge and also in the freezer. This way you
don't end up eating the whole batch and can savour them for
an afternoon treat.

Wednesday, January 4, 2012

Watermelon

I'm currently obsessed with anything associated
with watermelon. Watermelon colour palate,
watermelon scent, watermelon drinks.


As a result of this obsession I recently purchased
 a mini glass jarwatermelon candle (smells divine
and so adorable) from Snice candles, a new find at the
Port Market, they even make special order scents!


Along with two nail polishes from Rimmel London,
Apricot Punch(this one smells fruity when dry)
and Hot and Spicy.


Pinned Image


These Watermelon and Honeydew Aguas Frescas from
The kitchn are looking beautifully cooling for a Sunday arvo
as the weather has certainly being sorching hot lately.

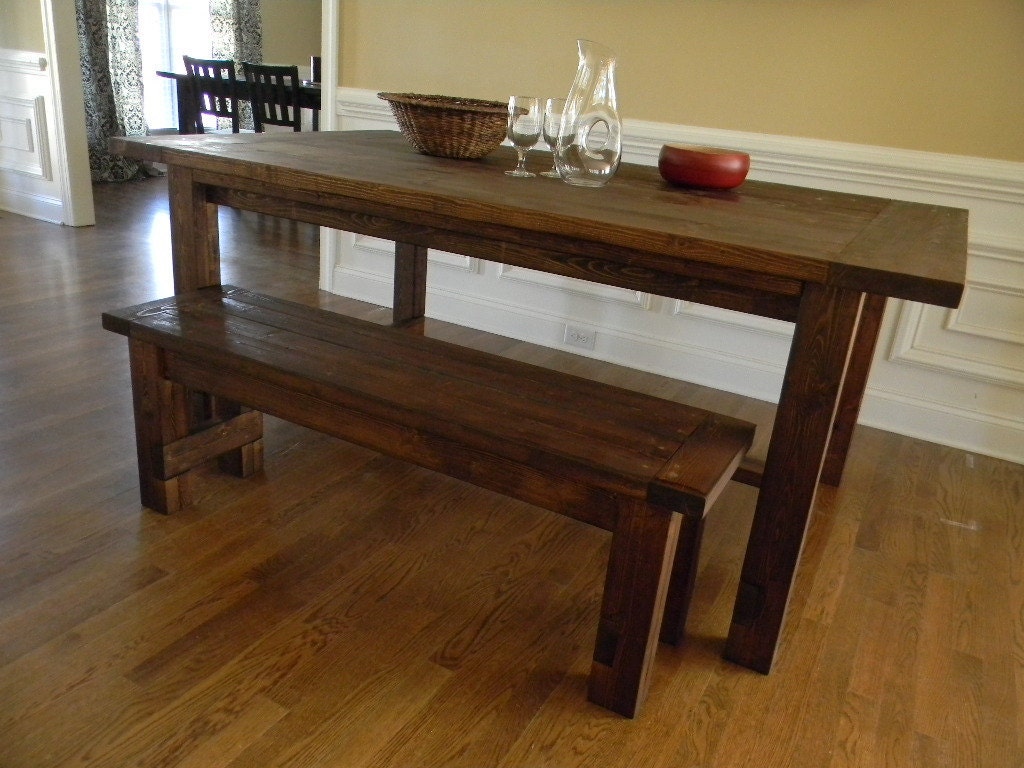
Wooden tables

oak edge - oak & slate dining table with benches
                        ( Pacha Design - Oak / steel table)


When I eventually purchase a house of my own, the first
item of staple furniture I'm going to buy is a large 'farmhouse'
style wooden dining table. The kind that is rustic, thick, chunky,
rich and deep in colour and preferably bench seating. I've fallen
madly in love with these types of tables over time with
the notion that this table creates a homely atmosphere and
becomes a fixed structured part of the family. They appear to me
as though if you sat down and listened closely the table would tell
you its history.


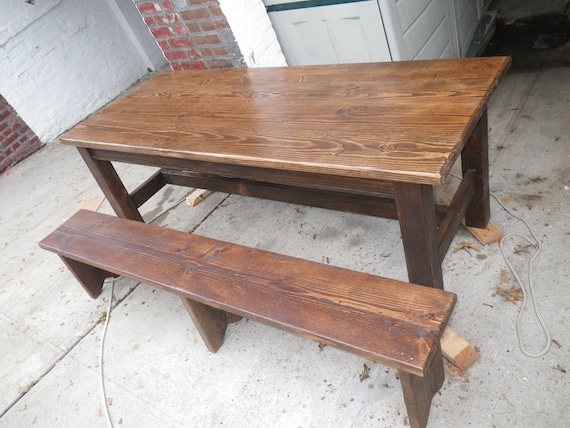
Farmhouse Dining Table
              (Carolina Farmhouse - Farmhouse dining table)

This table brings forth future visions of Sunday morning breakfasts
/ brunches with girlfriends, Sunday summer night cocktail parties,
weekly afternoon tea parties and the main hangout point of any holiday
celebration. The memories this table will be a part of is the most
romanticizing idea of it all. Perhaps I've fantasized too much about this
table and over exaggerated the limits of what a table can actually do.
Oh well. No harm in dreaming. I just need to find one I love in Australia,
as I'm guessing the shipping costs from USA / UK on a table would be
quite expensive!


 German Beerhall Dinner Table
               (iNG Furniture - German Beerhall Dinner Table)

Tuesday, January 3, 2012

2012 and Cupcakes


Ending 2011 by baking cupcakes, bringing in 2012
by eating those cupcakes. This is how my new year
began along with watching the broadcasted fireworks
with my family. Celebrating the new yearcould not
have been any better.

I decided to make cupcakes for our new year treat 
as they always remind me of happy cheerful celebrations
and of course being a kid. New year always brings along
nostalgia. These cupcakes are easy and quick to make.
They also taste good as the cupcake has more of a dense
cake rather than the light fluffy sponge like cupcakes due
to the almond meal.I've also foundmost cream cheese
frosting recipes can be quitesickly sweet but this recipe
from Donna Hay is not too sweet which I adore and
becoming a 'go to' in my recipe collection.

Quick tip: If you want a nice smooth and flat cupcake
top so the frosting can be easily applied, before baking
smooth batter by running the back of a heatedspoon over
the top and  when the cupcake come out of the oven, cool
them upside on a cooling rack.

Did anyone else bake for new years?

Happy New Years Everyone.

Almond Cupcakes with Cream Cheese Frosting

Cupcakes (makes 12 sml standard cupcakes)
150g butter, softened
1/2 tspn almond essence
2/3 cup caster sugar
2 eggs at room temp
1/3 cup self-raising flour
1/2 cup plain flour
1/2 cup almond meal

(Recipe from; Aus Women's Weekly - Cupcakes)

Cream Cheese Frosting
250g Cream cheese, softened
1/3 cup icing sugar
1 1/2 tblspn lemon juice

(Recipe from; Donna Hay - Classics)

Preheat oven to 180 *C and place patty pans in 12 hole
muffin pan.Beat together butter, essence, eggs and sugar
until creamy, pale in colour and fluffy. Gradually add in sifted 
flours only mixing till just combined.Divide among the cases.
Bake for 20mins or until tops lightly spring back.
Cool on wire rack.

For the frosting, beat cream cheese until smooth and creamy.
Add in the sugar and juice until also smooth. I love decorating
cupcakes by always piping the icing and always adding
sprinkles. Ah sprinkles. This purchased colour combination of
pink, pearl and yellow is my favourite. I grab a packet evertime
I walk down the baking isle just in case one time its no longer there.